
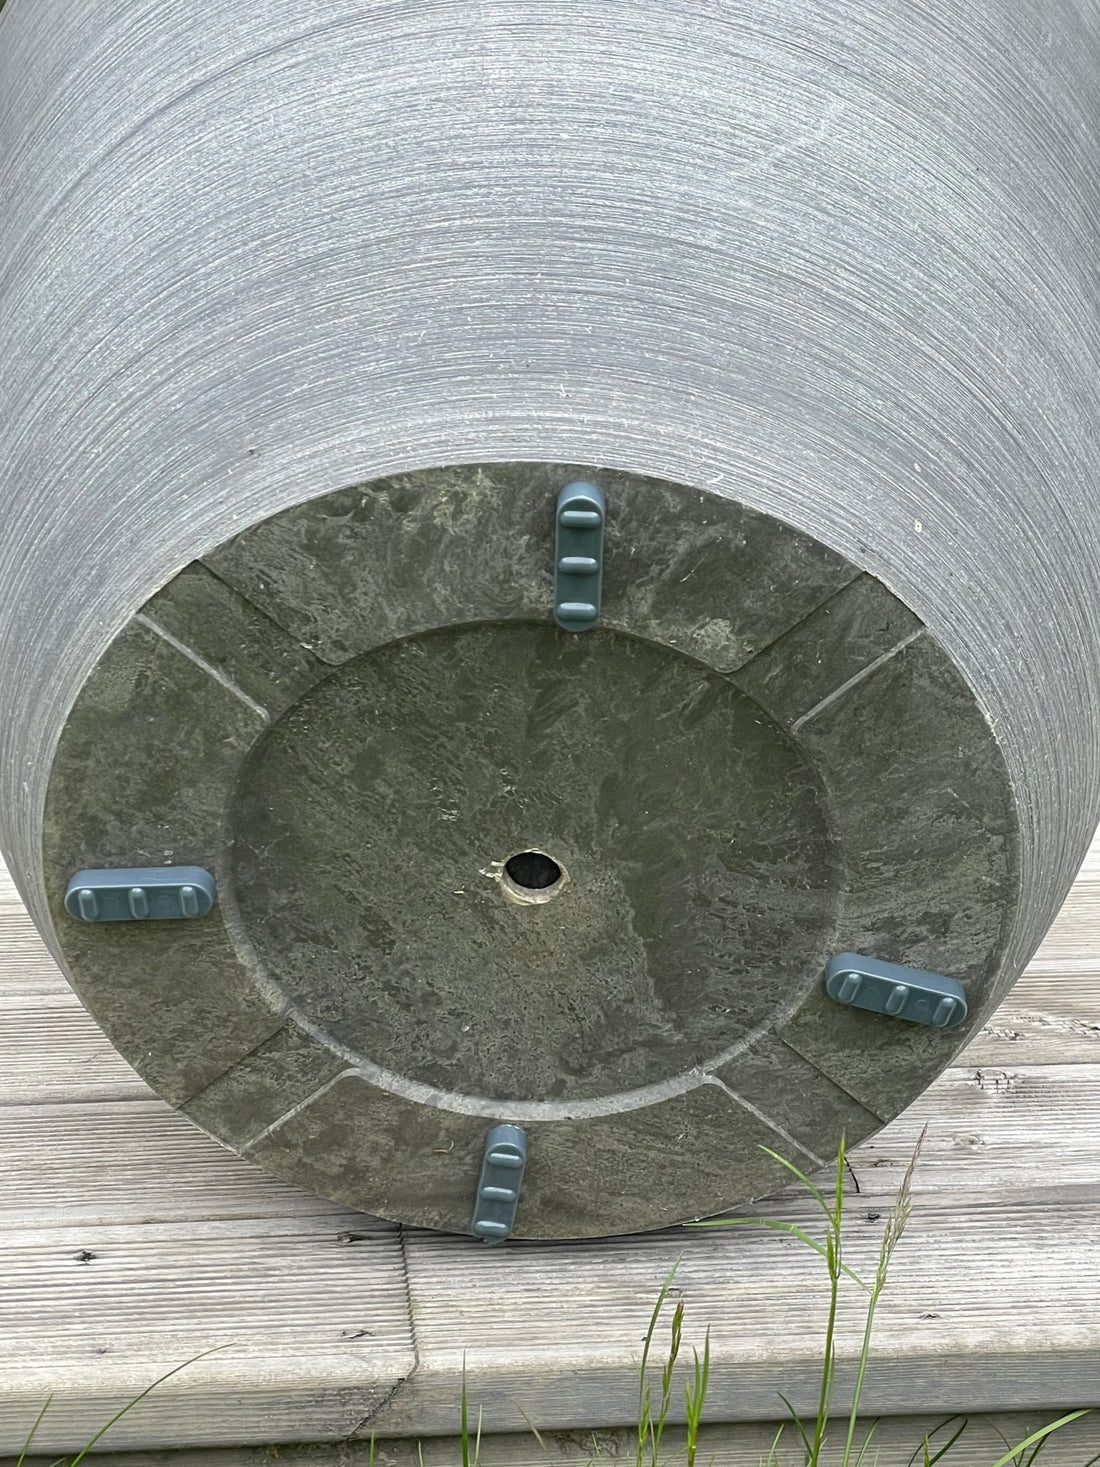
Potteben use double-sided tape to help keep the feet in position beneath your planter. A clean, dry attachment area and an even arrangement give you the best starting point.
1. Clean and dry the base
Remove loose dirt and dust from the areas where the feet will attach. Let the base dry completely. Work with the pot safely supported, and get help if it is heavy. Do not turn a filled planter upside down unless you can do so safely.
2. Choose the positions
Use three feet for smaller, lighter pots and four for larger pots. Space them evenly on flat areas of the base, without covering drainage holes. Keep them far enough apart to support the pot securely; hiding the feet should not come at the expense of stability.
Each pack contains four feet. Three packs provide twelve feet: enough for four small pots using three each, or three larger pots using four each.
3. Prepare porous surfaces: the nail polish trick
On porous concrete or similar materials, tape may struggle to adhere. A small patch of clear nail polish or a suitable primer can help seal the attachment area. Test on a hidden area first, and follow the coating manufacturer's instructions.
Apply only where the tape will sit and let the coating dry completely before attaching the feet. Leave drainage holes clear. This treatment does not level an uneven base or guarantee adhesion on every material.

4. Attach the feet
- Remove the protective film from the tape.
- Place each foot on its prepared attachment area.
- Press firmly to make good contact.
- Set the pot down carefully and check that every foot rests securely on the surface.
5. Check stability and move with care
The pot should stand evenly without rocking. Allow about 24 hours for the tape to develop its hold before moving the pot, as described in our fitting guidance. Adhesion depends on the surface, temperature and preparation.
When you need to move the pot, lift it rather than sliding it. Check the feet again after moving. The feet create space beneath the pot; they are not a watertight tray. Indoors, use suitable protection if water could reach the floor.
Choose Potteben for your planters, or see how to fit the job into your autumn tidy-up.